In my journey to learn the evolving topic of IT and cybersecurity, I am taking as much of an advantage of the resources I am given through my schooling. My program coordinator has a full school subscription to several magazines and other educational deals on training/certifications.
This post will talk about and identify important information from the course “Ubuntu Forensics” from, of course, the eForensics Magazine training.
This post is meant to be educational content.
Tools and Usage
The first tool is dd. This tool is used to create physical or bit-for-bit copies of filesystems. The ensures that all sections of a disk are copied like unallocated space which is space that is not within a created partition on the disk or slack space is the difference between the logical size and the physical size, it may contain deleted files.
To start using dd the basic structure of the command is looks like;
dd if=[input-file] of=[output-file] bs=[block-size] status=[LEVEL]
The first two arguments are the name of the input file and output file. The input file is a device file from /dev/.... The output file is the name of the output file can be just the name which will output the disk file into the current working directory.
The next commands are hash value checks. md5sum and sha1sum will accept a file and output the file’s hash. The command used without any arguments, it outputs the files md5 hash.
md5sum DISK_IMAGE.dd /dev/[device-file] > DISK_IMAGE.md5

md5sum -c DISK_IMAGE.md5
Another basic command helpful for linux forensics is the mount command. This allows for a user to mount real devices as well as disk images created from dd.
mount -t [filesystem type] -o [option] [image] [mount-point]

## An example command looks like;

mount -t vfat -o ro,loop,offset=32256 DISK_IMAGE.dd /mnt/DiskImage
To do the reverse, unmounting of a drive. Use umount [mount-point].
Sometimes a physical disk can be very large and unmanagable due to its size. To solve this the next tool dc3dd can separate the disk image or device file into multiple files of equal size. The command has options to name the output files, to hash the file chunks while imaging the drive and to set the size for each file chunk.
dc3dd if=[device-file/image-file] [h]of[s]=DISK_IMAGE.00 -ofsz=[FILE-SIZE] hash=[hash-algorithm] log=DISK_IMAGE.log
In this course, I will be using other tools but these seem like the most important and understanding them provides a base knowledge for how filesystems/forensic imaging work.
Seized Device Image
For this eForensics Course, there are several assignments provided. The first one of which is working with a set of seized device image files. The goals are to 1. Mount the split forensics image 2. Calculate the hash for the image and 3. Extract filesystem information.
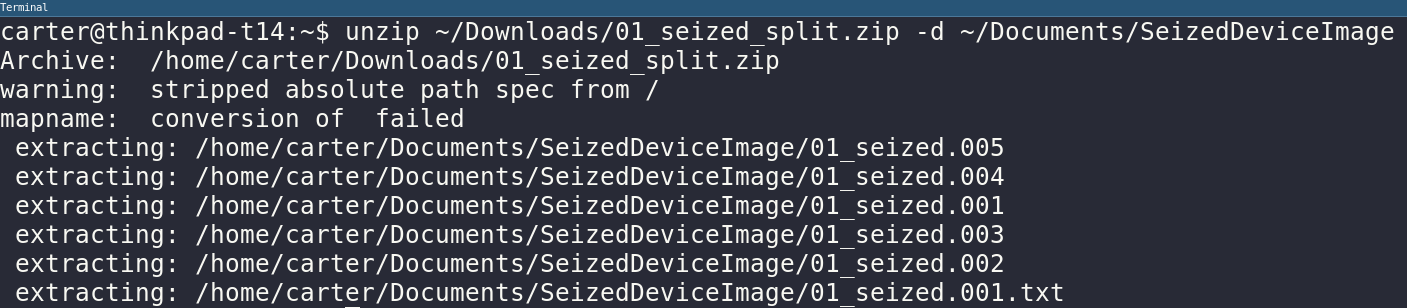
To start, the dropbox downloaded a zip file and I unzipped this into a folder in my documents folder.
The next step is to use xmount to join the split image files and mount them as an active file system in the operating system.

Let’s find some information about the image like sector size and offset of the first partition. SleuthKit has a perfect tool to display partition data from image file. This will be done using the mmls.
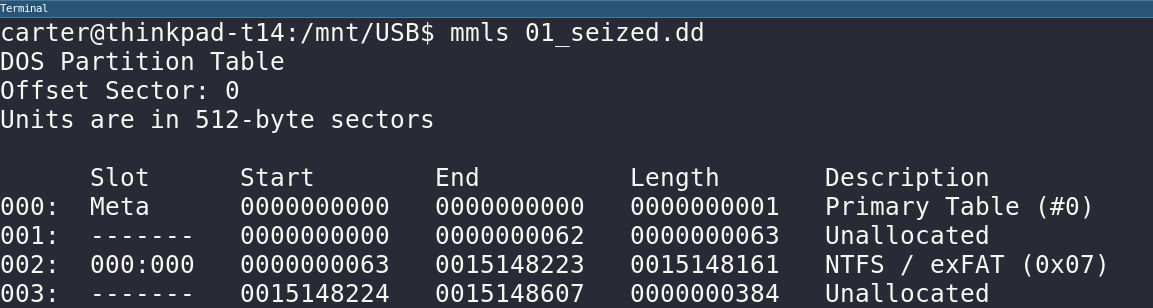
Finally, I want to extract the partition containing actual files which would be the NTFS / exFAT partition in the mmls output. We can use mmcat to extract the second (002) partition in the image.

The final part of the assigment is filling out a specific table with other information about the partition and image files.
Extracting Deleted Files
First, lets check the exFAT partition to find some deleted files.

The fls command has the -d option which shows deleted files. There is also an option all files with -F.
Once a file inode is found with fls, you can use icat to extract the file into the host.

Conclusion
This wraps up the first module of eForensics Ubuntu Forensics and so concludes the first blog post about this course. I hope this showed someone more understanding about ubuntu forensics.